Installation
GOFTER.app should be moved into the Application folder or any subfolder therin.
When running MacOS X 10.8 or higher, the first time the application is launched, the following error message may appear: "GOFTER can't be opened because it is from an unidentified developer".
You have two options to run GOFTER:
- Right- or CTRL-click the program icon and choose Open from the context menu
- Modify the Gatekeeper settings in the System Preferences in order to allow any software to be installed on the system (less secure)
If there is a persisting thru connection from an earlier session (in the case that the application abnormally quit earlier, any pending MIDI handling is reset.
Demo Version / Updates
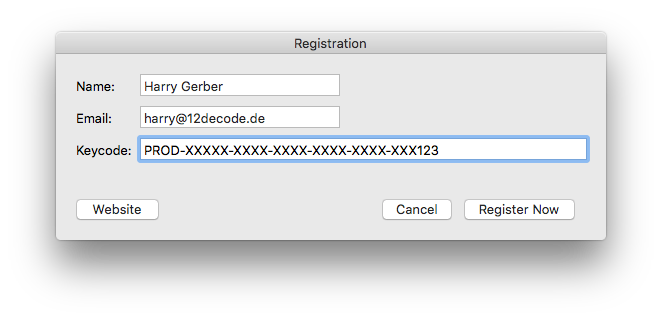
If GOFTER runs in demo mode, a registration window with instructions how to obtain a full version key will appear.
By selecting "Check for Updates" from the main menu, a new version can be installed from inside the application, if available.
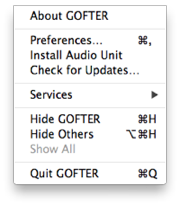
Also from the application menu it is possible to install the accompanying Audio Unit Editor. By default, the Plug-In is installed in the user specific library folder: "~/Library/ ... ". For making it available for all users of the machine, it may be copied by hand to "/Library/ ... " instead.
MIDI Setup
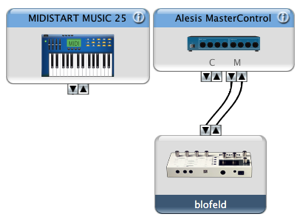
For the editor to function properly, a two-way (input/output) MIDI connection to the Blofeld has to be etablished. This is where all system exclusive data requests and dumps are taking place.
Optionally, an Input Keyboard may be connected via MIDI Setup. For the blofeld, this is not particularly necessary because of the dedicated DIN MIDI input.
The midi-thru functionality can be disabled in the preferences (see below).
Main Window
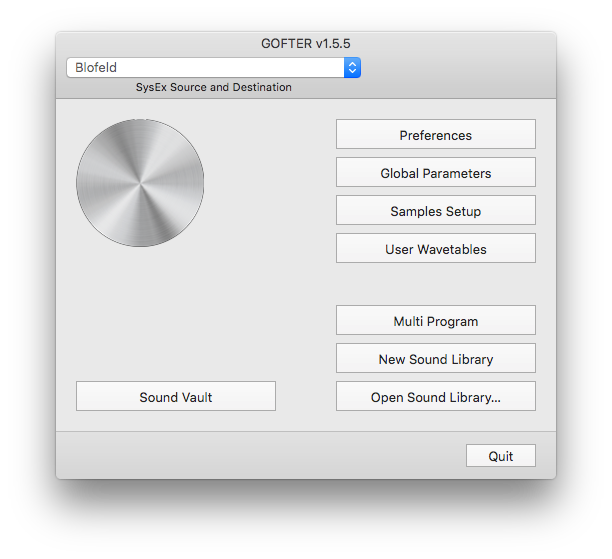
The blofeld has to be selected as SysEx source and destination from the popup in the toolbar. If all is well connected and running, the current firmware version will be printed underneath the big grey icon. Also clicking on this graphic button will force a version number request.
Preferences
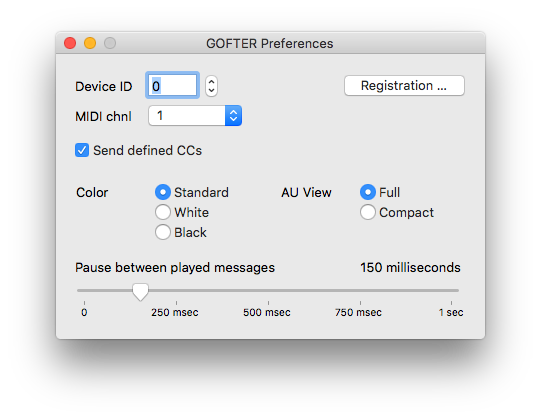
Device ID and MIDI channel should match the associated settings in the Global Parameters Dialogs. Otherwise, no communication will be possible at all.
Global Parameters
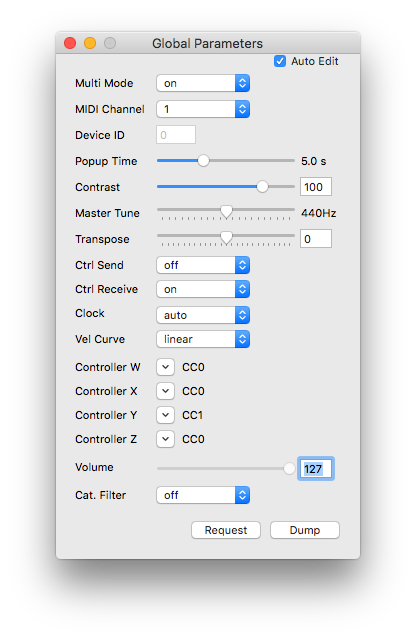
In this window, it is necessary to set the param "Ctrl Send" to "SysEx" and "Ctrl Receive" to "ON" for the editor to work properly.
Also, the MIDI channel, where SysEx Messages are sent and received, has to be selected.
Multi Programs Window
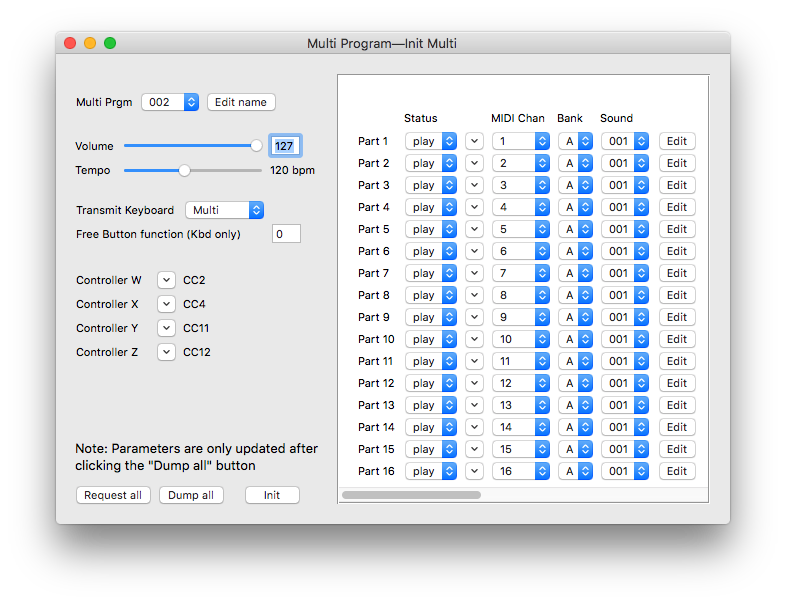
The multi program window gives the opportunity to edit all parameters of the 16 parts that make up a multi program.
When clicking the "Multi Program" button in the main window, the currently selected multi program is requested from the blofeld and its parameter can be edited. The referenced sound programs are either listed by index or, if a sound library has been requested or dumped earlier, by their names respectively.
To edit a different multi program, it is necessary to choose it manually on the synthesizer and do a request for updating the view. In the other direction, it is possible to store a loaded multi to any desired location.
Because there is no system exclusive protocol available to change one parameter at a time, all data has to be updated by pressing the "Dump all" - button.
Library Window
The library window is the place to organize sound patches for the blofeld.
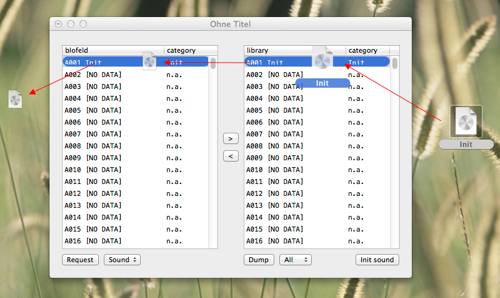
Request Sound/Bank/All
Before we can work with the sound patches of the blofeld, we have to get them into the left table.
It is possible to request them individually, bank-wise or all at once.
By opening a system exclusive data file, the contained sound dumps are stored in the library. From here they may be drag&dropped individually to the blofeld. By clicking the "Dump all" button, all patches can also be transferred at once. They can also be copied into the blofeld table without explicit dumping them by pressing the small arrow button.
A click on the blofeld's sound program list switches the current sound program via program change/bank select message.
A double click will open the chosen patch for editing.
Patches from the blofeld can be drag&dropped to the Finder.
By clicking the "All to library" button, they will be transferred to the library.
A changed library can then be saved to disk.
Dump all
By clicking the "Dump all" button, all loaded patches are transferred to the blofeld. They can also be copied into the blofeld table without explicit dumping them by pressing the button labeled '<'.
A new library can be filled with sound dumps with drag&drop from the Finder.
The "Init Sound" button will create a basic patch at the selected location.
Sound Edit Window
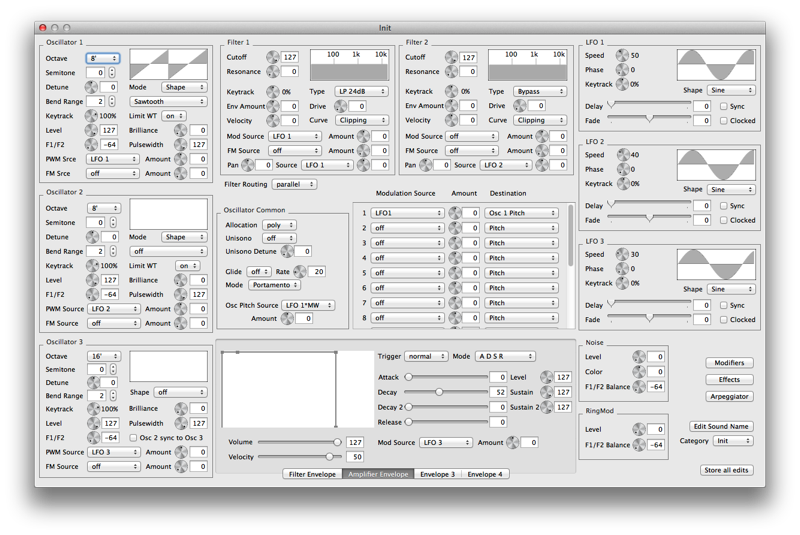
Most parameters in the sound edit window can be changed by entering a numerical value in the text field next to a circular slider. By using the arrow keys on the keyboard, the currently selected slider will be decrement/incremented by one.
Another possibility to fine tune a value is by turning the mouse's scroll wheel while pointing at a particular slider.
There are three external palettes available: Modifiers, Effects and Arpeggiator.
Modifiers
Algorithmic modifiers are handled inside a separate palette.
Effects
Effects are handled inside a separate palette.
Arpeggiator
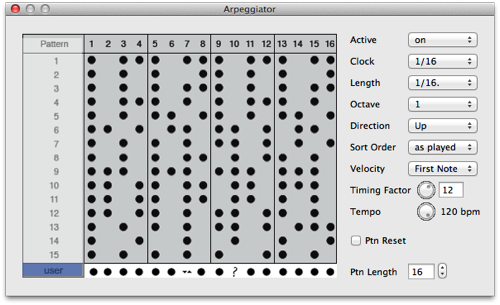
The pattern is selected by clicking the "Pattern" column at the desired row. After selecting the last row "User", the pattern can be fine tuned by clicking on a step. A popover will open for additional parameter setting. Please consult your blofeld manual for more information.
Samples, Wavetables & Waves
Samples Setup Window
The Samples Setup Window gives access to the Samples Presets/Programs that have been loaded via SPECTRE.
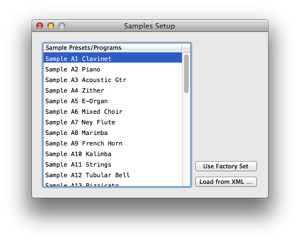
If "Use Factory Set" is selected, the standard samples are made available in the shape popups in the Oscillators section of the sound edit window.
Alternatively, it is possible to import an XML file provided by SPECTRE (see Waldorf's documentation on this topic)
User Wavetables Window
User wavetables is a feature of the blofeld for creating a wider range of timbres. However, it is not possible to request existing wavetables from the synthesizer, so the window shows only imported tables and tables that have been generated by algorithmic definition or additive synthesis (as described below).
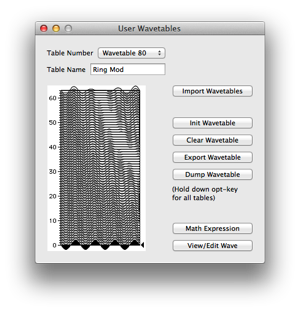
After selecting one of the available user wavetable slots, a table name (up to 14 characters long) may be entered.
It is possible to scroll through all waves in the table by moving the little triangle handle on the right side.
User Wavetables Operations
Import Wavetables will scan any MIDI/SysEx file for contained wavetables and gives a graphical representation of the data.
Init Wavetable(s) will write zero data into each of the 64 contained waves. This way, it is possible to erase any existing table(s). However, after doing so with all userwaves, the dump of all wavetables will take quite an amount of time.
Clear Wavetable(s) on the other hand will mark the table(s) as invalid, so they will be skipped on an export or dump.
Export Wavetable(s) writes the current selected table or all defined tables to disk.
Dump Wavetable(s) will overwrite wavetables on the blofeld (but only those that are defined will taken into account).
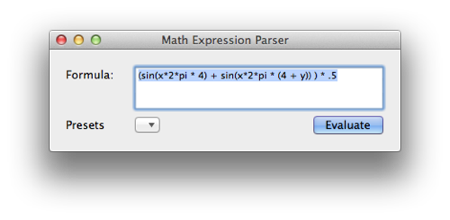
Math Expression
By entering a mathematical expression, a wavetable can be calculated given wave sample x and table position y as dependant variables.
Wave Editor Window
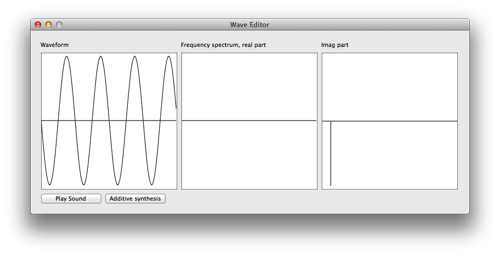
The Wave Editor Window gives a detail view of the currently selected wave and its fourier transformed spectre.
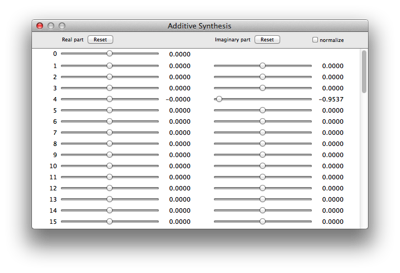
The Additive synthesis button opens a window where the wave can be generated by real and imaginary values for 64 partials.
Audio Unit Plugin
General Information
Please note, although the GOFTER Audio Unit is specified as an Instrument, it does not generate any sound by itself.
The device for SysEx communication is directly accessed in the AU View, after the AU View has been loaded.
The first step is usually a request of the current sound patch from the synthesizer. The parameter widgets will all be updated and it is possible to send individual parameter changes.
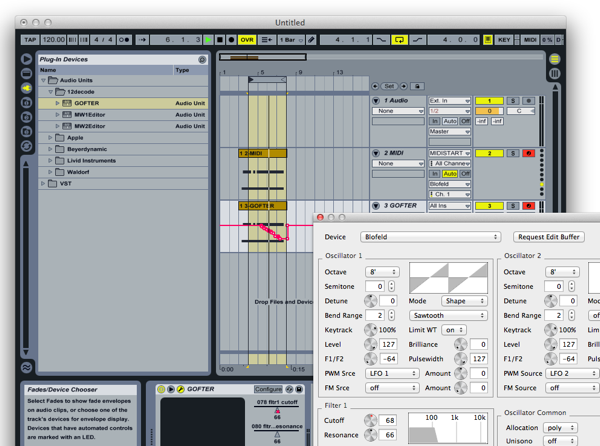
The other way around, when properly configured, any automated parameters from the DAW are recognized and updated values are sent to the synthesizer as well. See the picture below for an example how to setup a simple filter sweep using Ableton Live as host application.